Adding support for OAuth in Xamarin applications is easy. Most of the work is already implemented in the class OAuth2Authenticator. In this article, I will show you how to use it and how to get over some minor challenges in an Android app. The Android application will authenticate with external authentication providers like Facebook or Google to authorize calls to my own service. The servicer-sider part of the authentication process has been laid out in the previous articles of this series. So, let’s go through the steps of adding support for OAuth in Xamarin Apps With OAuth2Authenticator.
Setting up and adding Xamarin Apps With OAuth2Authenticator
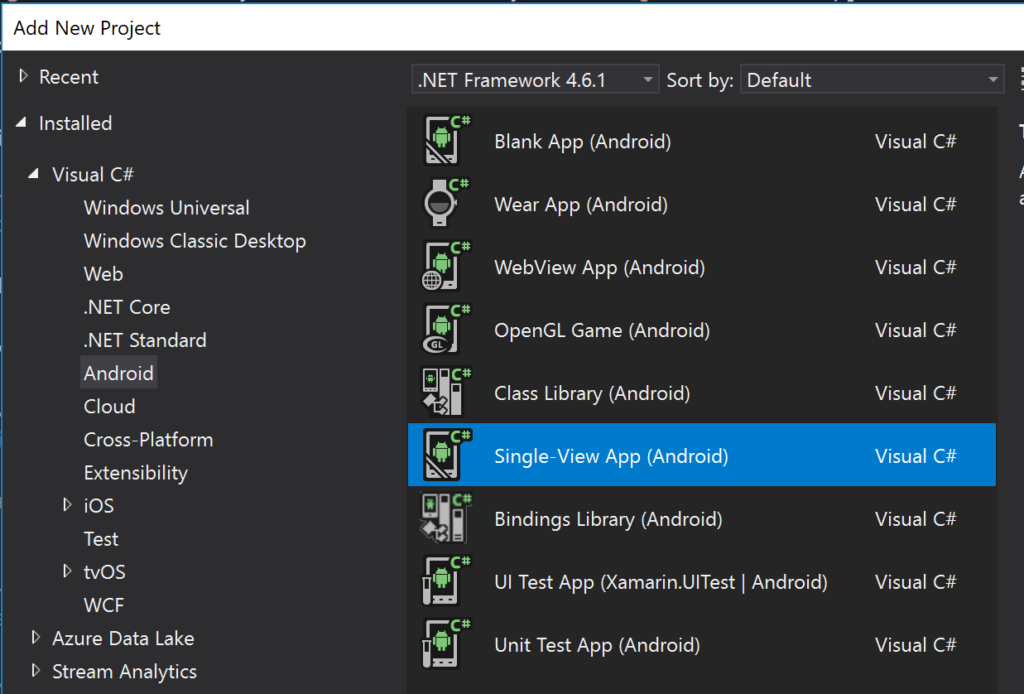
In this simplistic example, all we need is a bare Xamarin Android application. Although I’d normally recommend MvvmCross for Xamarin applications, we’ll do without here to keep it simple. To start, add a new project to your solution. After that, add a new Single-View Android app project. This project template will set up an Android app with on view (or activity, as it’s called in Android).
Next, add the NuGet package Xamarin.Auth. This package contains a client implementation for OAuth authentication. Consequently, this will take care of all the tedious details of the authentication process for us. The class that encapsulates all the OAuth stuff is the OAuth2Authenticator.
Dealing with HTTPS
What we want to do is to call our REST service with an HttpClient, get the list of bananas and display the bananas in a list view. So the core code is…
var httpClient = new HttpClient();
var json = await httpClient.GetStringAsync(new Uri("https://192.168.179.25:50163/api/Banana"));
var bananas = JsonConvert.DeserializeObject<string[]>(json);

this.listView.Adapter = new ArrayAdapter<string>(this, Resource.Layout.BananaListItem, Resource.Id.textView1, bananas);
Of course we know that the call to httpClient.GetStringAsync() will result in an HTTP 401 and thus in an HttpRequestException. However, if we try it out, we won’t event reach that point. Instead, the call to httpClient.GetStringAsync() will eventually throw a TaskCanceledException. Then we’ll notice an error output on the server console stating that “a call to SSPI failed” and that “The client and server cannot communicate, because they do not possess a common algorithm“.
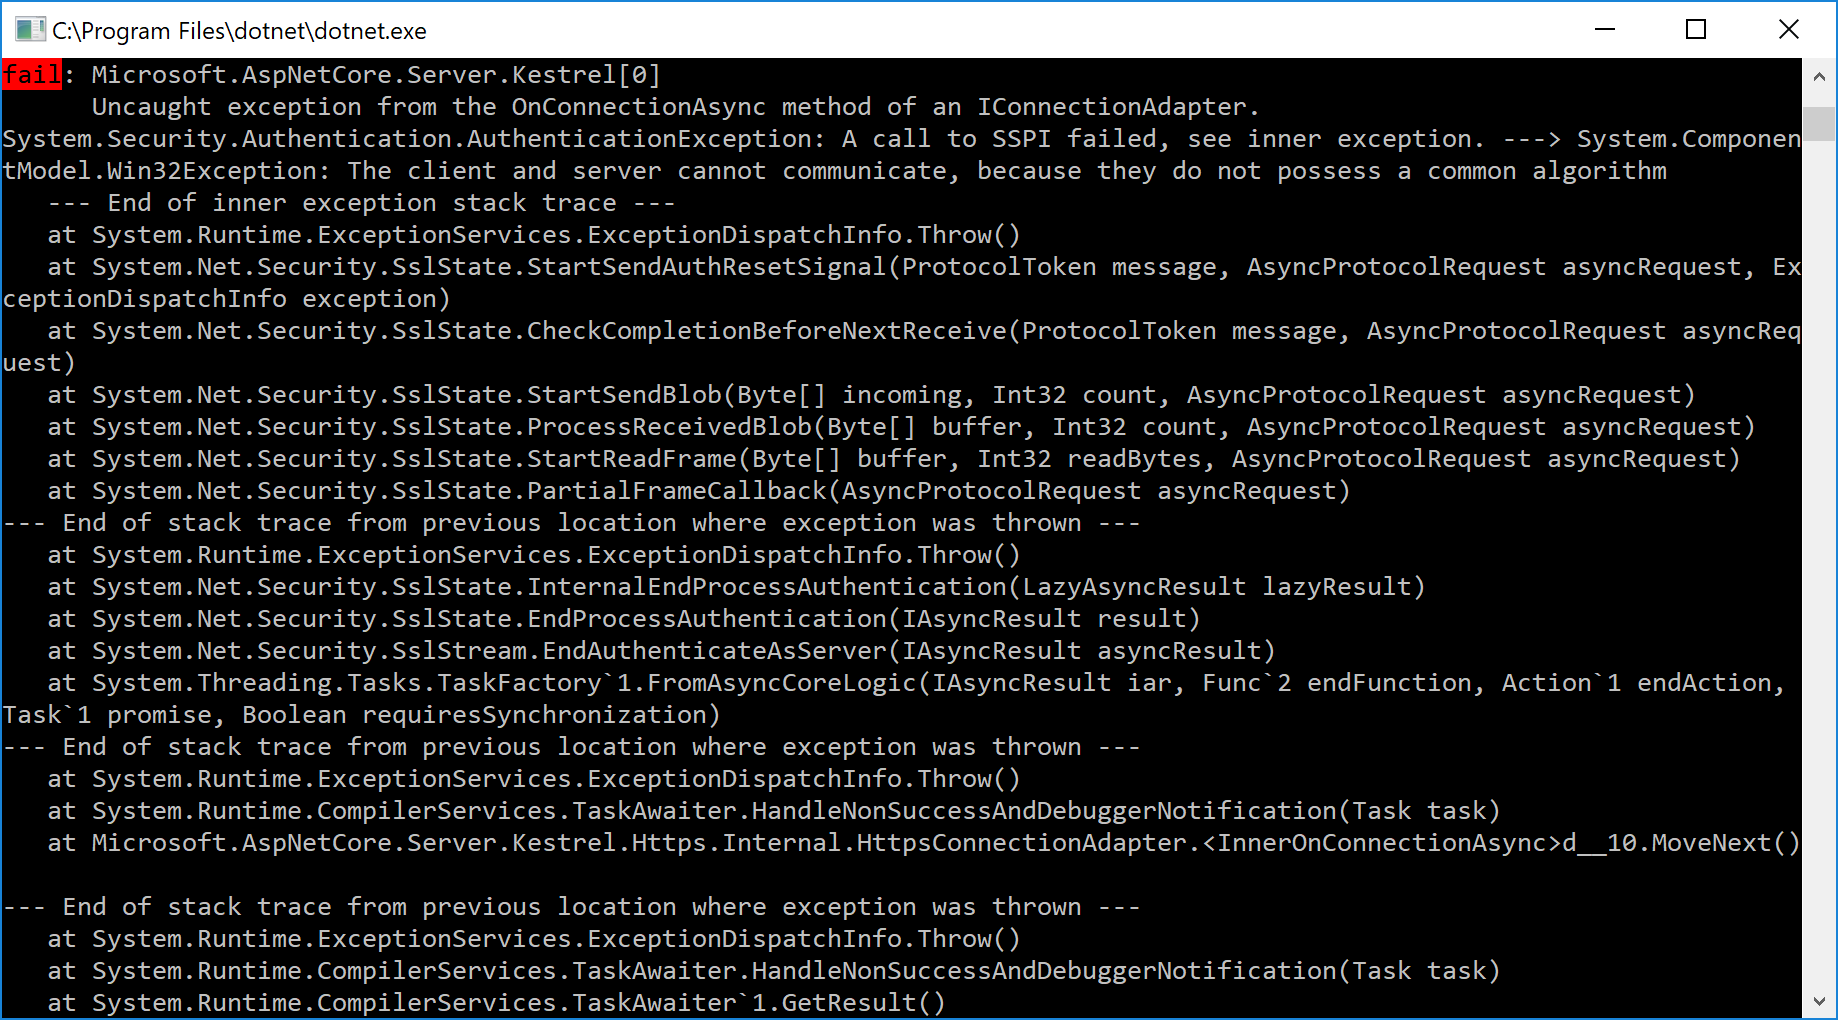
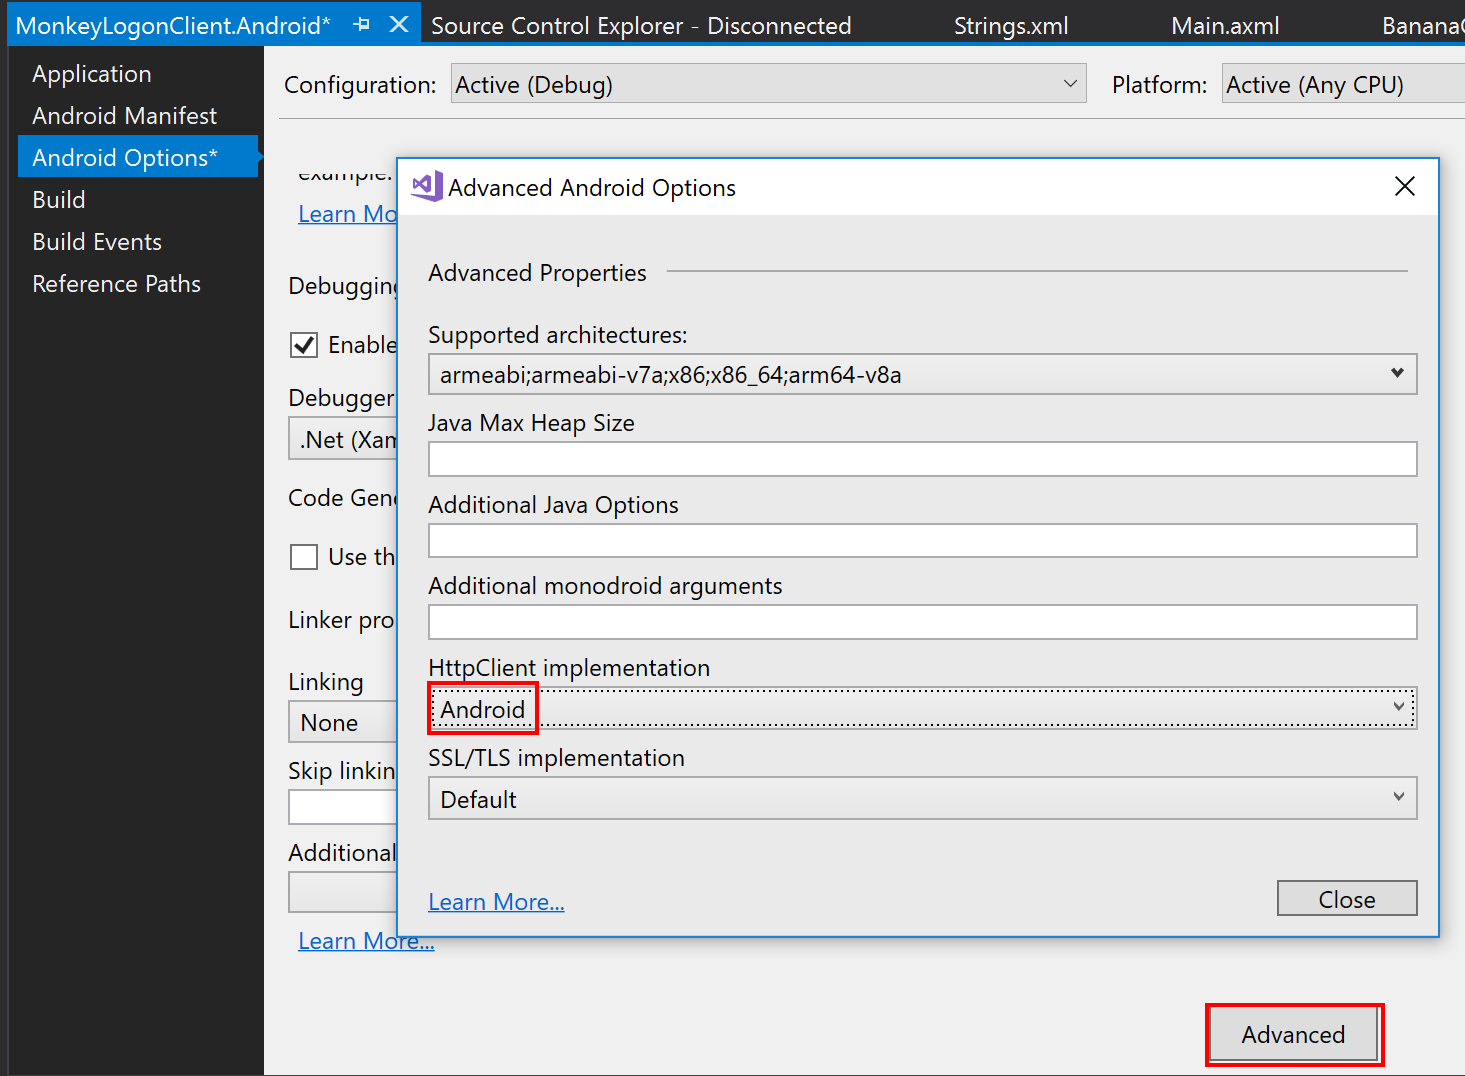
So what’s happening here? The HttpClient used here only implements TLS 1.0 while the server requires version 1.1 or 1.2. Fortunately, applies to the fully managed implementation only of the HttpClient and we can switch to a native implementation. So in the project properties of the Android application, on the “Android Options” tab, click “Advanced” and select “Android” in the “HttpClient Implementation” dropdown.
Bypass the certificate validation on the client
Now, try again. The error from above is gone, but instead we get an SSLHandshakeException on the client and an error stating that “an unknown error occurred while processing the certificate” on the server. So what now? Remember that we are using a self-signed certificate on the server. The client isn’t able to validate the server certificate. To be able to continue, we must bypass the certificate validation on the client. I’ve written an article on how to do that before. If you follow that article, you’ll end up with two new classes: BypassHostnameVerifier and BypassSslValidationClientHandler. So the instantiation of the HttpClient from above will look like this, now:
var httpClient = new HttpClient(new BypassSslValidationClientHandler());
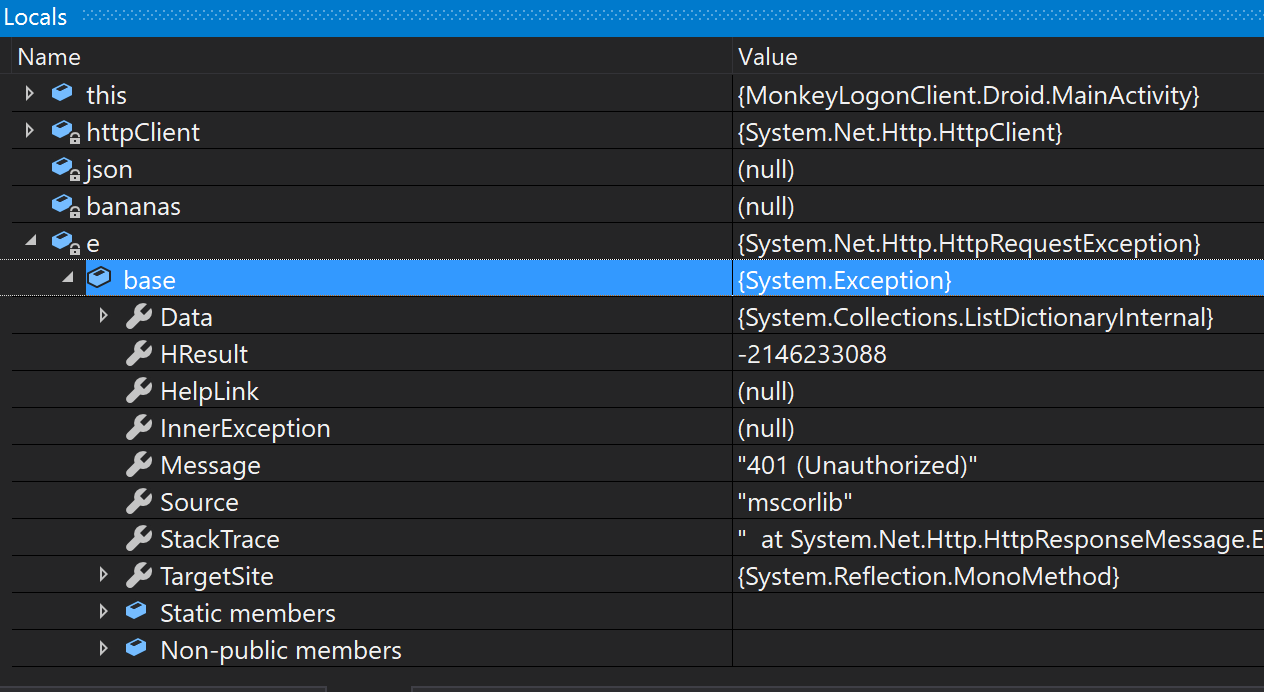
Try again and…. yaay, we get our expected HttpRequestException with an 401 HTTP code.
Authentication using OAuth2Authenticator
Now we can implement the authentication. Xamarin.Auth provides a class called OAuth2Authenticator that encapsulates the whole server communication for us. All we need to do is to provide some server parameters and to route back the server response to the OAuth2Authenticator. The first step is easy: provide necessary server parameters.
var authenticator = new OAuth2Authenticator(
    clientId: "monkeylogonclient",
    scope: "profile",
    redirectUrl: new Uri("com.example.mhuss.monkeylogon:/oauth2redirect"),
    authorizeUrl: new Uri("https://192.168.179.25:50163/account/authorize"),
    isUsingNativeUI: true)
    {
        AllowCancel = true,
        IsLoadableRedirectUri = true
    };

authenticator.Completed += (__, e) => this.OnLoggedOn(e);
Most method arguments are self-explanatory, I guess. The first three represent the OAuth parameters, i.e. the client ID of our application, the scope (i.e. the returned access token should allow us to retrieve the user’s profile information) as well as the redirect URL (here, the URL is a deep link back into the mobile app – we’ll get to that soon). The argument isUsingNativeUI is required for Google authentication. Google blocks OAuth requests made via embedded browsers, so we’ll need to use Android’s native browser. Setting isUsingNativeUI to true indicates to use the native browser. At the end we add an event handler that accepts the results of the authentication process.
To initiate the authentication process, we use OAuth2Authenticator to get an intent and then we use that intent to launch a new activity. This new activity will be the native browser that calls our service’s OAuth endpoint.
ActivityCustomUrlSchemeInterceptor.Authenticator = authenticator;
var intent = authenticator.GetUI(Application.Context);
intent.SetFlags(ActivityFlags.NewTask);
Application.Context.StartActivity(intent);
Passing the data to the OAuth2Authenticator
There’s just one thing: when the authentication process ends successfully, the service will redirect back to the URL that we provided. In this case, the URL is a deep link back into our mobile app. We need to intercept that deep link and pass the data contained in the link to the OAuth2Authenticator. To achieve this, create a new activity that is called when the link is navigated to. We do this using an intent filter. This new activity, the ActivityCustomUrlSchemeInterceptor, has a static property named “Authenticator”. In the code above we set this property to the newly created instance of OAuth2Authenticator. Instances of ActivityCustomUrlSchemeInterceptor can use this property to pass data to the OAuth2Authenticator.
Activity(Label = "ActivityCustomUrlSchemeInterceptor")]
[
    IntentFilter
    (
        new[] { Intent.ActionView },
        Categories = new[]
        {
            Intent.CategoryDefault,
            Intent.CategoryBrowsable
        },
        DataScheme = IntentFilterDataScheme,
        DataPath = IntentFilterDataPath
    )
]
public class ActivityCustomUrlSchemeInterceptor : Activity
{
    internal const string IntentFilterDataPath = "/oauth2redirect";
    internal const string IntentFilterDataScheme = "com.example.mhuss.monkeylogon";
    public static OAuth2Authenticator Authenticator { get; set; }

    protected override void OnCreate(Bundle savedInstanceState)
    {
        base.OnCreate(savedInstanceState);

        if (Authenticator != null)
        {
            var uriAndroid = this.Intent.Data;
            var uriNetfx = new System.Uri(uriAndroid.ToString());
            Authenticator.OnPageLoading(uriNetfx);
        }

        this.Finish();
    }
}
As soon as the code line “Authenticator.OnPageLoading(uriNetfx)” is executed, the authenticator processes the authentication result and eventually raises the Completed event. The event args of that event contain all properties returned by the server. We are expecting a parameter called “access_token”, so we can get it like this:
authenticator.Completed += (__, e) => Console.WriteLine(e.Account.Properties["access_token"]);
Putting it all together, the event handler of the Completed event now looks like this:
private async void OnLoggedOn(AuthenticatorCompletedEventArgs e)
{
    if (!e.IsAuthenticated)
    {
        return;
    }

    var authToken = e.Account.Properties["access_token"];
    var httpClient = new HttpClient(new BypassSslValidationClientHandler());
    httpClient.DefaultRequestHeaders.Authorization = new AuthenticationHeaderValue("Bearer", authToken);
    var json = await httpClient.GetStringAsync(new Uri("https://192.168.179.25:50163/api/Banana"));
    var bananas = JsonConvert.DeserializeObject<string[]>(json);

    this.button.Visibility = ViewStates.Gone;
    this.listView.Adapter = new ArrayAdapter<string>(this, Resource.Layout.BananaListItem, Resource.Id.textView1, bananas);
}
Getting bananas
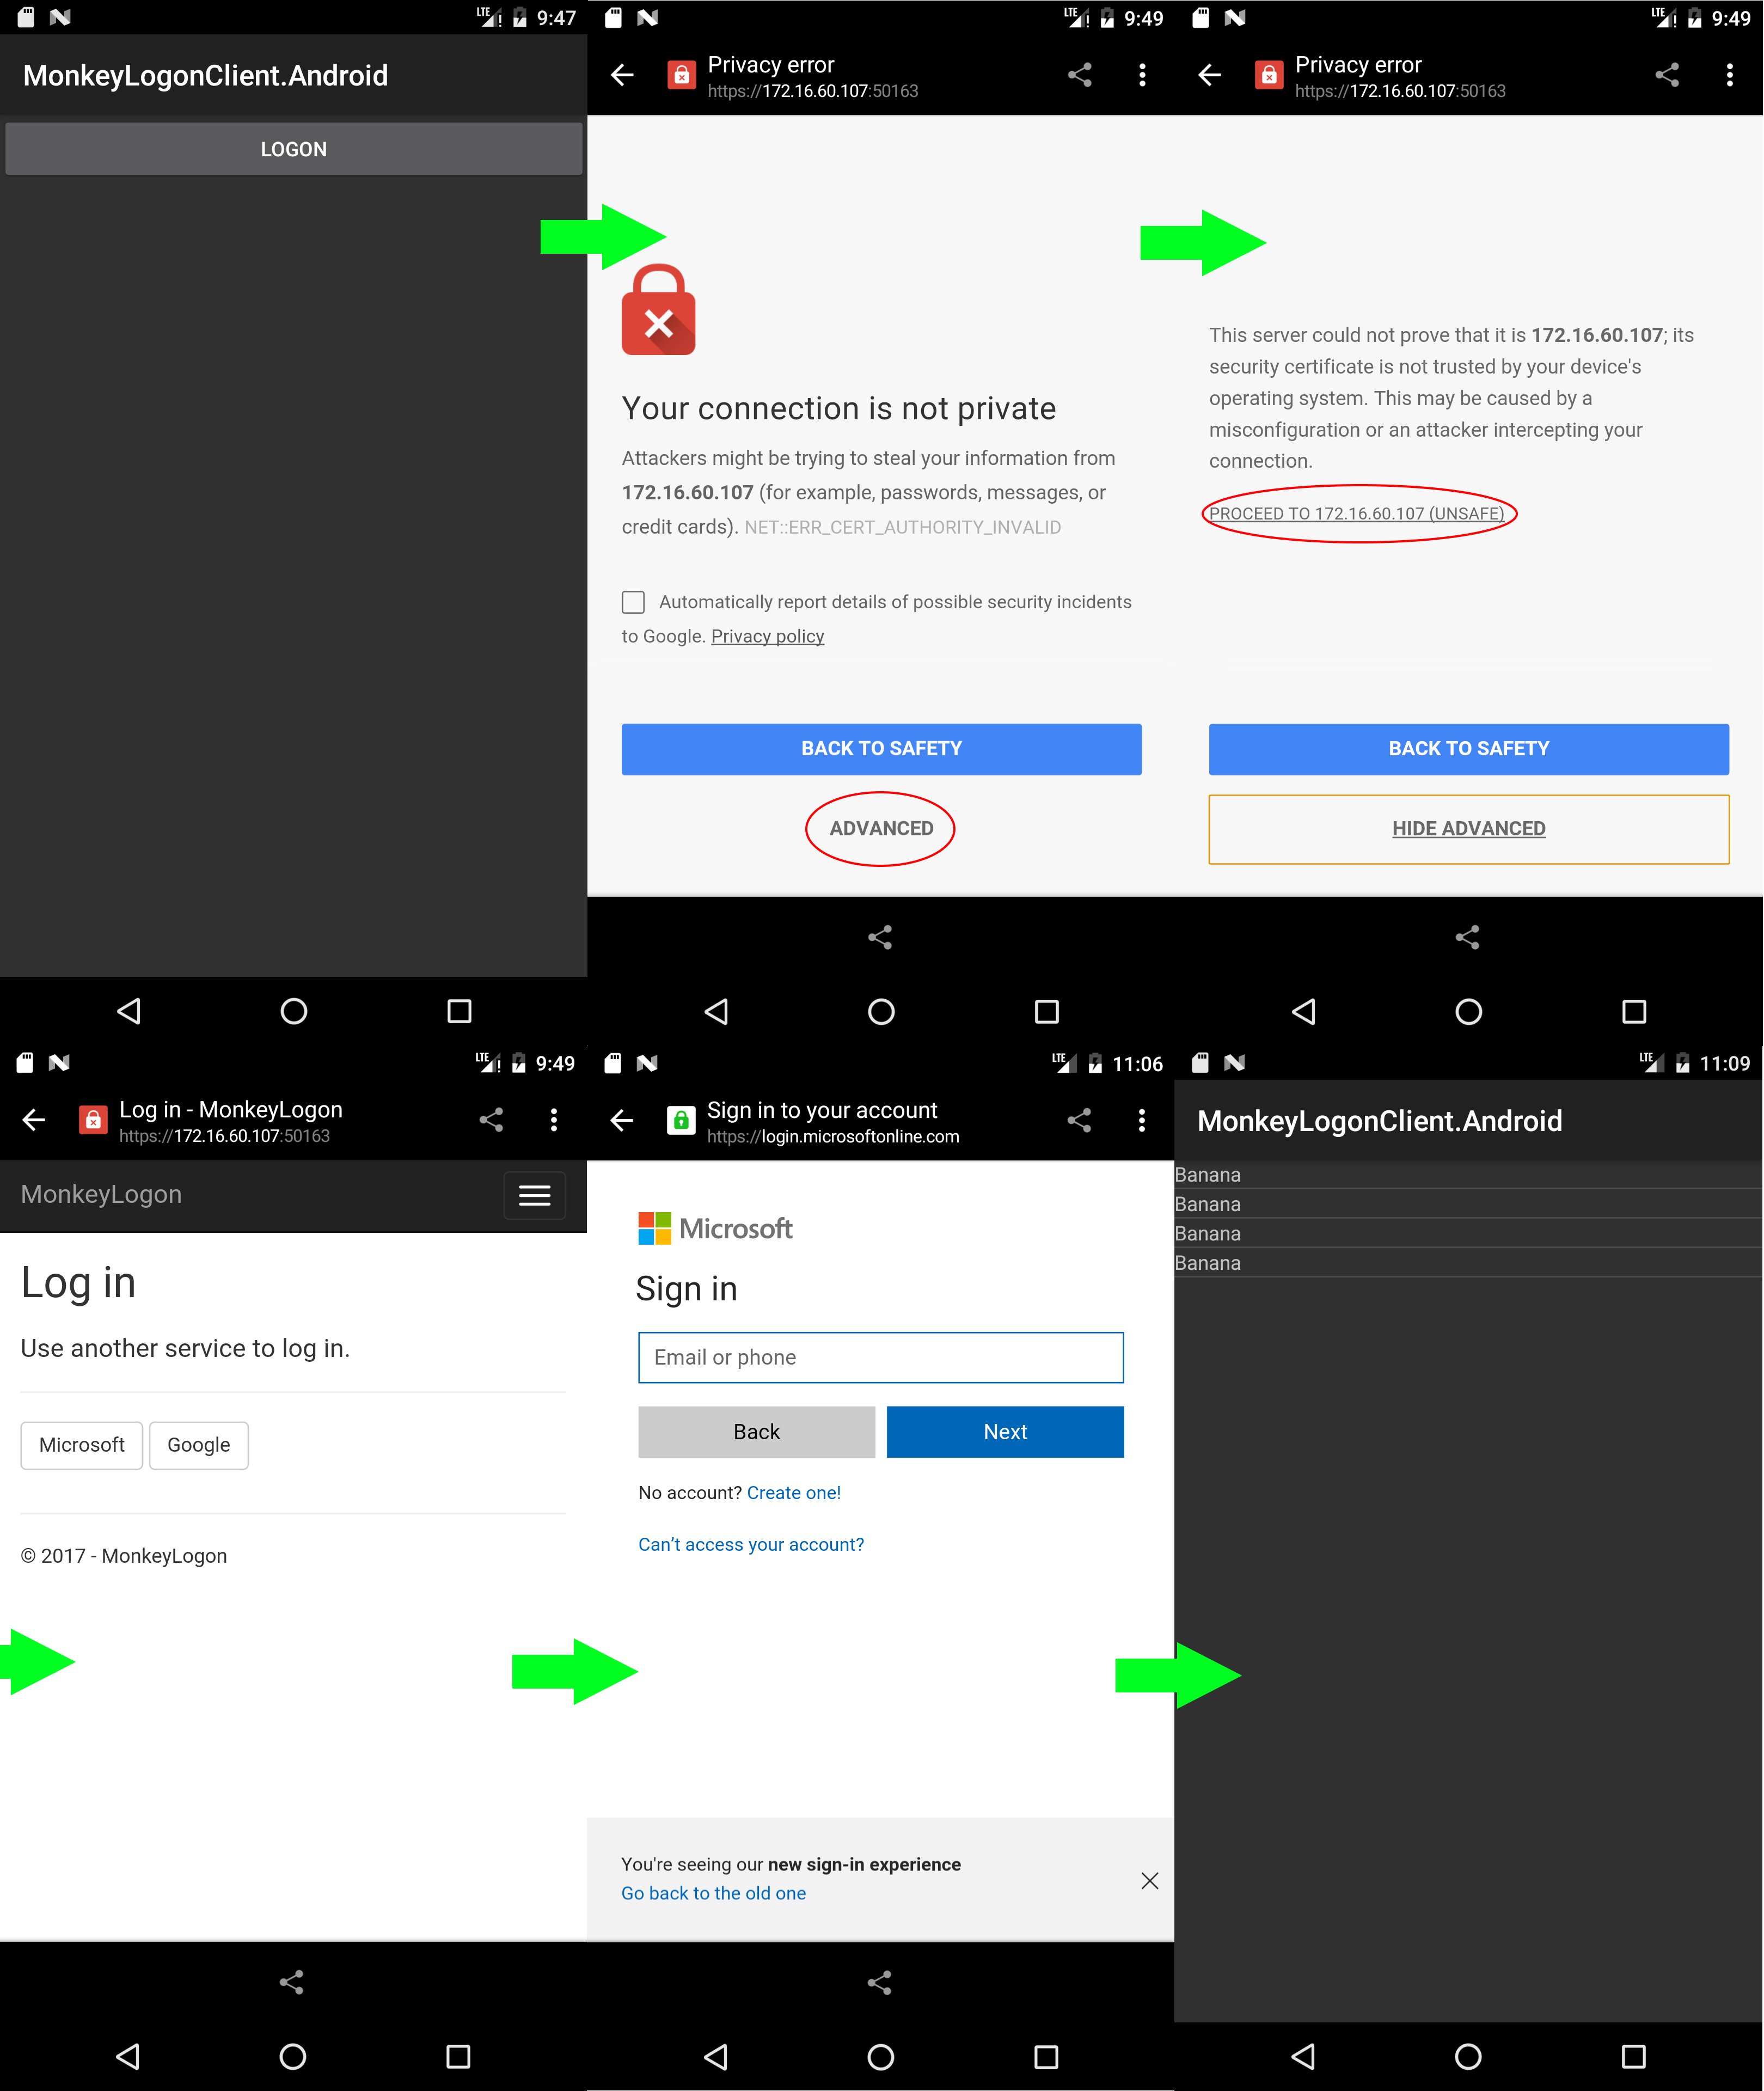
When we try out the authentication now, we will get a successful authentication process and will be able to retrieve the bananas from the service and show them in our application:
