

A common case for a modern mobile app: Users should be enabled to log on to a mobile app using external authentication providers only, e.g. Facebook or Google. The mobile app has a backing web service and it must safely and securely “share the user authentication” with the service to authorize service requests issued by the app. This blog series demonstrates my approach on this issue with a mobile Xamarin app and a .NET Core 2 and ASP.NET Identity-based web service.
Authentication in Monkey Logon
The sample code is a mobile app named Monkey Logon that displays a list containing some items with the text “banana”. At application start, the user must log on using his Twitter, Microsoft or whatever account. Upon successful authentication, the app reads the list items from a web service. When the user clicks an item, a service call is made to indicate that that list item should be removed. The service calls must fail when the mobile app does not supply valid authentication or authorization on the user’s behalf.
Choose the OAuth flow
When you want to use social login for your application, you need to adopt an OAuth flow. Since you’re authenticating a mobile app and you don’t want to store any client secrets on the user’s device, you’ll need to adopt an implicit flow. This actually quite easy because Xamarin provides almost everything you need to accomplish that. You can quite easily allow the user to login to your app using Facebook and others. The problem is that the user is logged on to your app, not to your backend service. Actually, this problem occurs no matter what OAuth flow you choose. Now you could send the authentication provider’s access token to your service on each request and let the service verify the token before processing the request. But that would mean that your service must call the authentication provider on each and every request. Apart from the massive impact on the overall response time, I’m not sure if the authentication provider will play nicely if your service starts calling it a couple of thousand times a second (depending on your own traffic, that ist).
So what do? Implicit flow but how? The answer is that your app will use the implicit flow to login on your own service, while your service logs on to the external authentication provider, handles its response, and, upon success, issues its own token to send back to your app. So what you’ve got is an implicit flow with an embedded code flow.
Overview of the authentication flow

- First, the mobile app calls an HTML page of the API server (e.g. ~/account/logon/). It provides a client ID, a redirect URL and a string representing a mobile app state. Let’s call the redirect URL “redirect URL A”. The page is displayed on a native browser app on the mobile device, not on a WebView control. On this page, the user can pick from a list of authentication providers.
- After selecting an authentication provider, the page redirects the user the logon page of the authentication provider. The redirection contains a second redirect URL (“redirect URL B”) and string representing the state of the API server.
- When the user successfully authenticates himself at the provider, the provider redirects the user back the redirect URL B. The provider attaches a query string containing the API server’s state and the provider’s authentication token to the URL.
- Back at the API server, ASP.NET Authentication verifies the state, examines the token and determines if the user is already known to the API server. If not, it creates a new user internal to the application. It obtains user name, profile picture and such from the external authentication provider.
- The API server creates a new access token. Then, it redirects the user with the redirect URL A back to the mobile app. It attaches the state of the mobile app and the new authentication token to the URL. The redirect URL allows the app to extract state and authentication token.
- From now on, the mobile app must send the authentication token with every request to the API server using Bearer Authentication.
Scaffold a web service with ASP.NET Identity
I’ll be going through most of the steps necessary to create a sample app I called Monkey Logon (you log on to your app to get bananas). You can find the source code on https://github.com/mhusseini/monkeylogon. If you’ve already created web applications with ASP.NET Core that use external authentication providers, you’ll find a lot of this very familiar. At the end of this article, we’ll have a web service that supports external authentication only (i.e. we’ll strip the ability to create a user name and password), and that allows users to log on using the browser. The web service will use ASP.NET Identity to help validating users and provide user information.
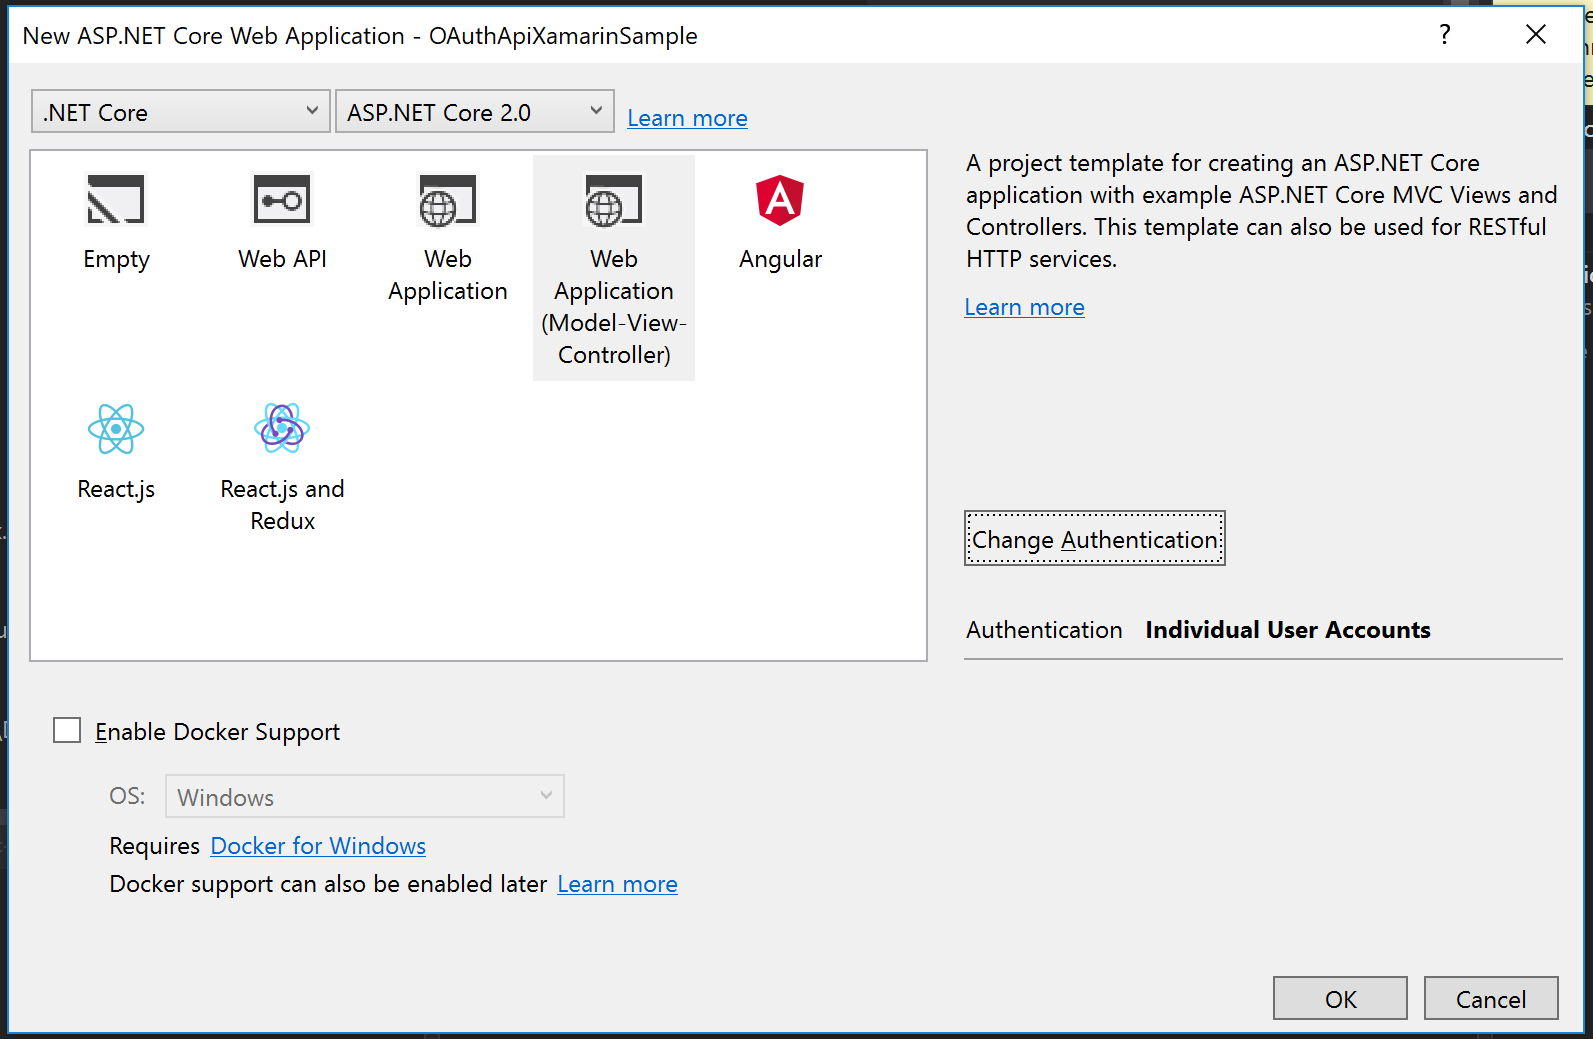
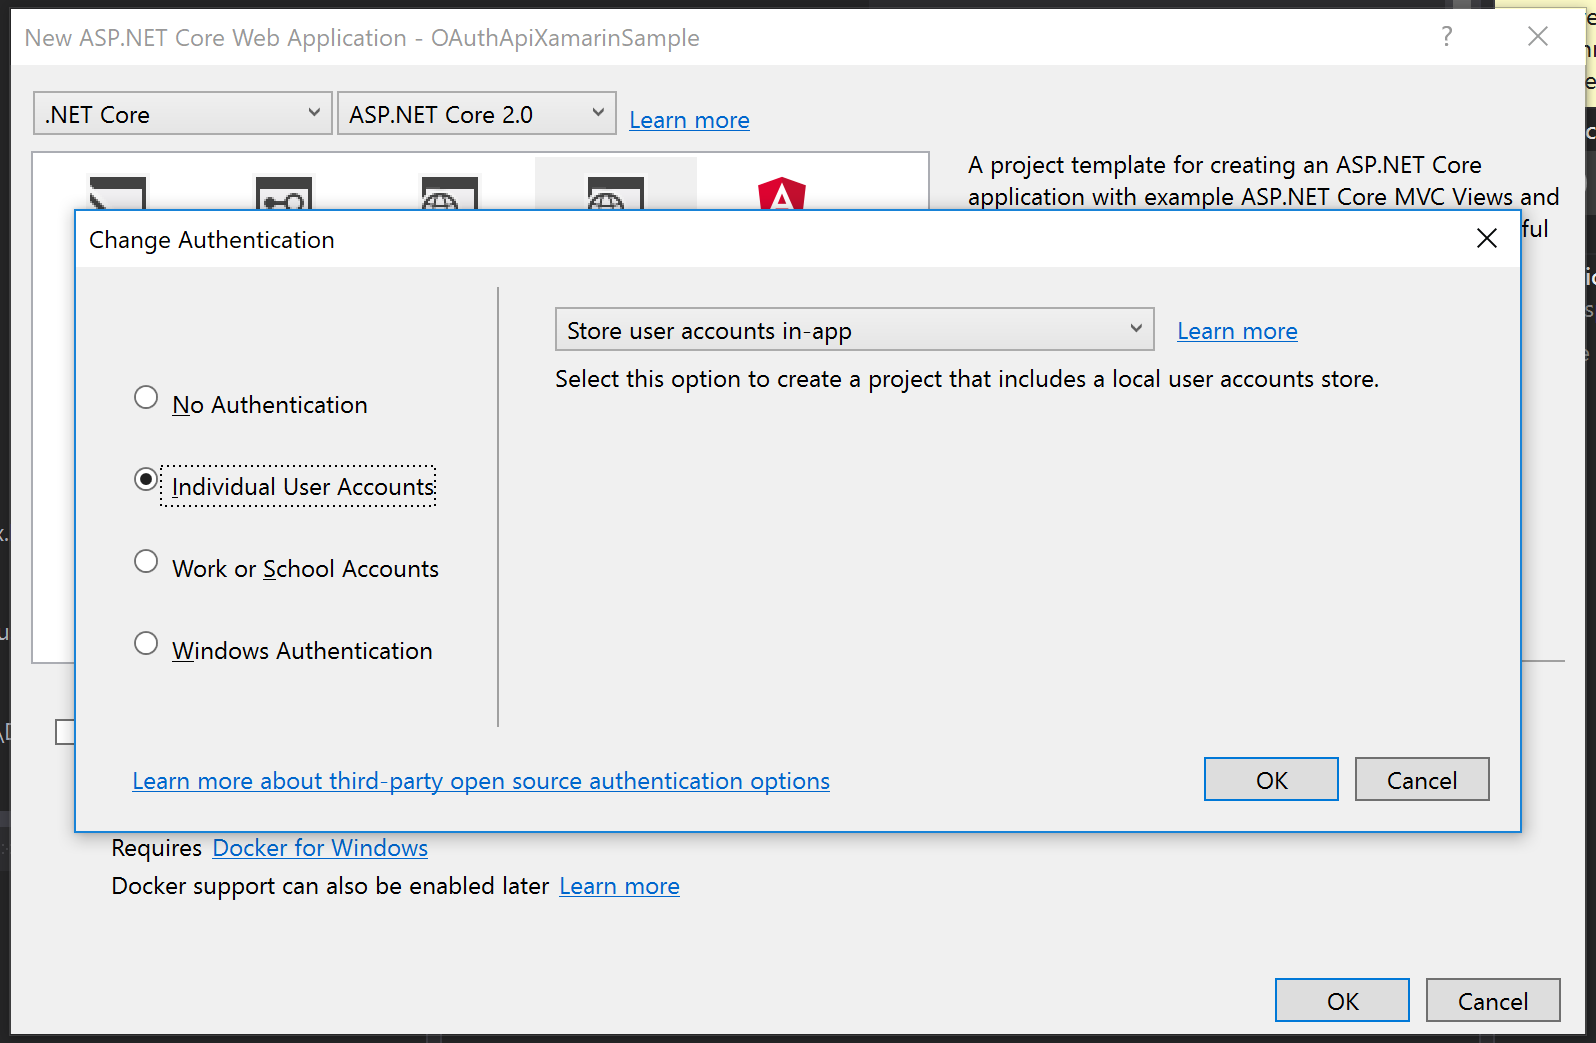
So let’s get started. Open Visual Studio and create a new project and choose “New ASP.NET Core Web Application” from the project template dialog. Call this project “MonkeyLogon.Server”. Still on the “New ASP.NET Core Web Application” dialog, select “Change Authentication” and choose “Individual User Accounts”.
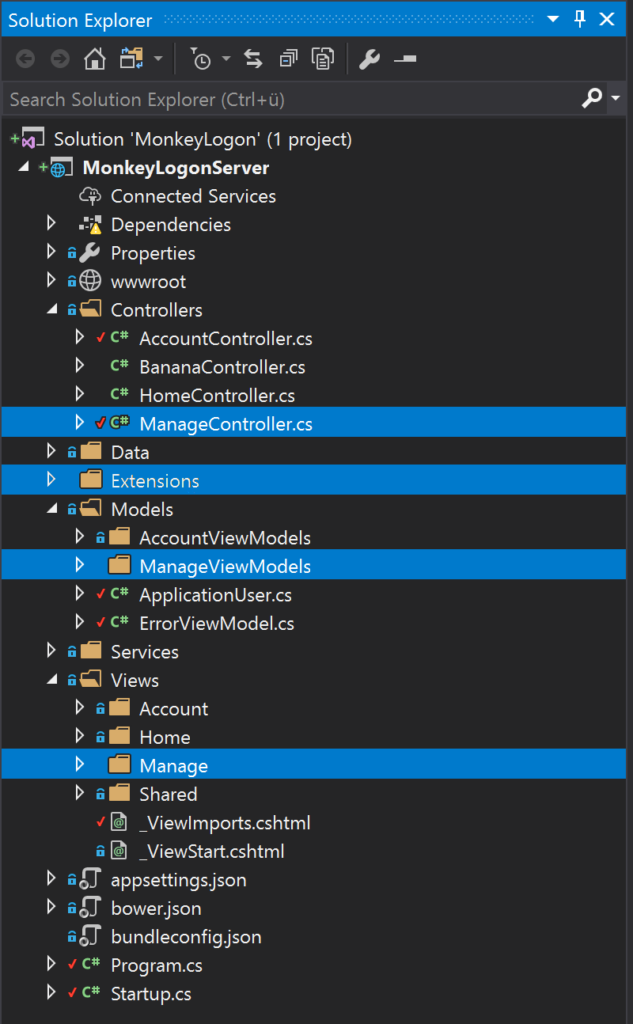
After that, click OK on each dialog and let Visual Studio scaffold a web application for you. Then, add a new empty API controller named “BananaController” into the “controllers” folder.
Remove unwanted code
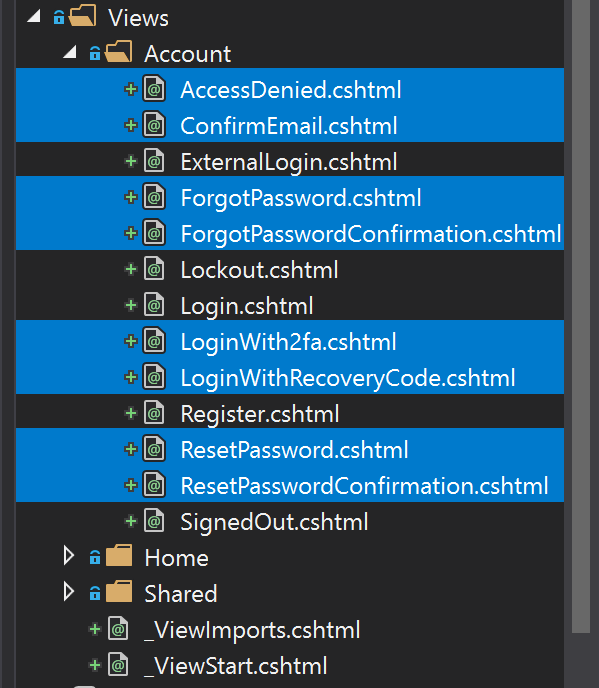
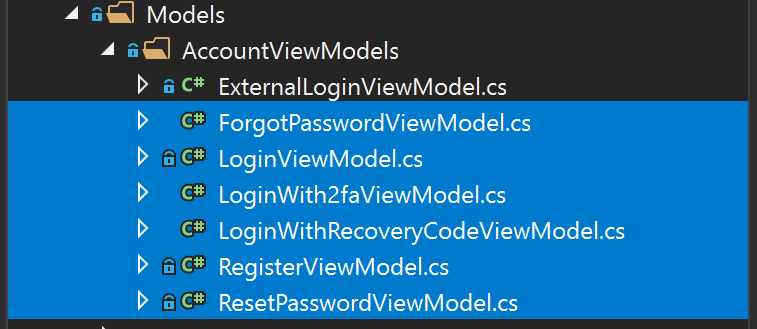
Next, we’ll delete all the files we don’t need in the application. We want to allow users to log on using external authentication providers only, we don’t want to store any passwords ourselves. So we will delete all files related to registration, user management and password authentication. Delete all files shown in the following screenshots.
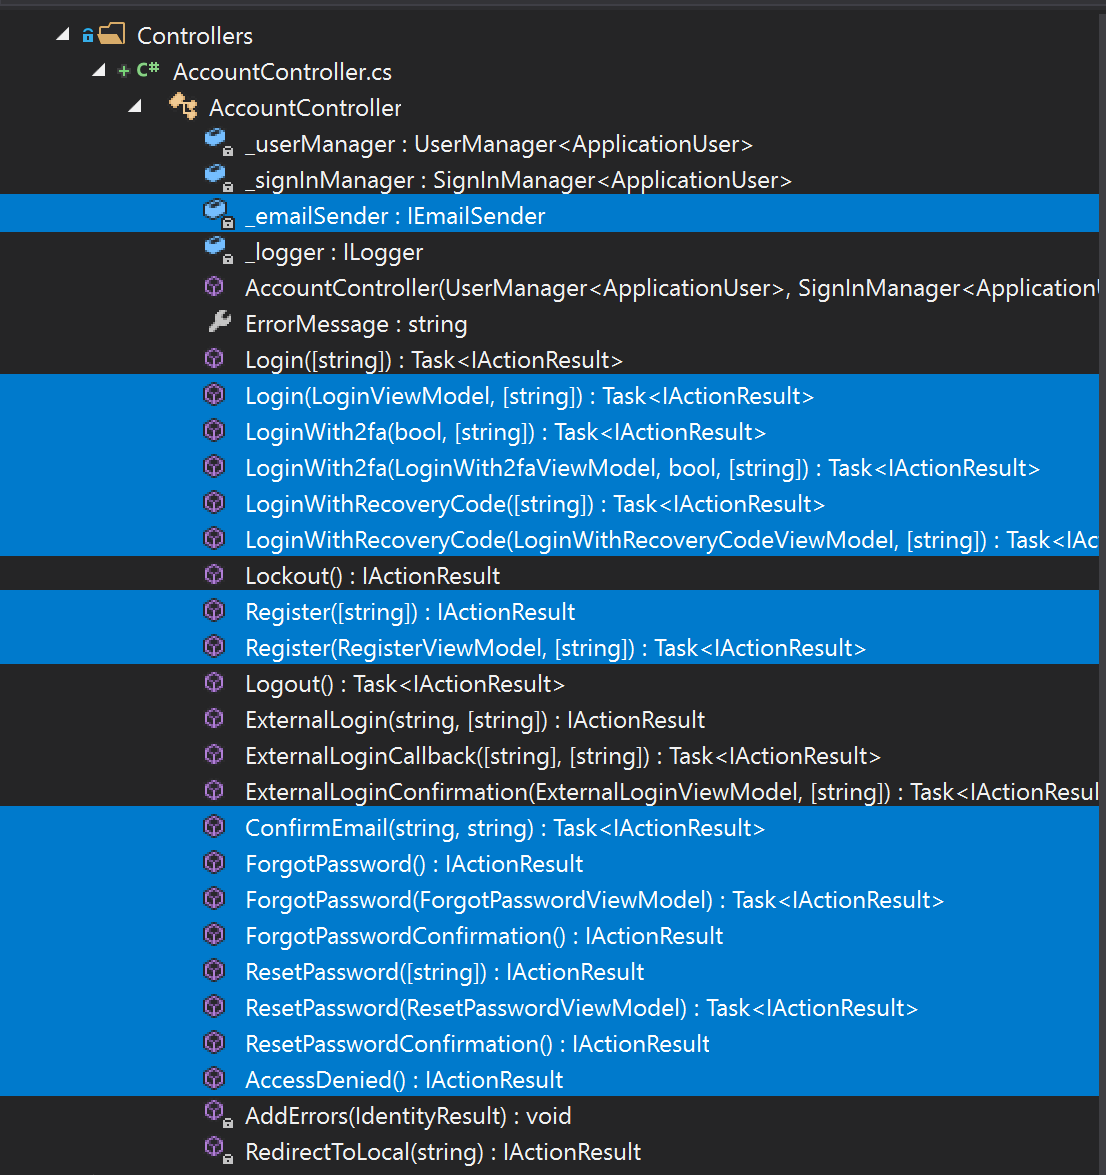
Also, we’ll strip the AccountController of the methods we don’t need. So in the file AccountController, delete all members shown next.
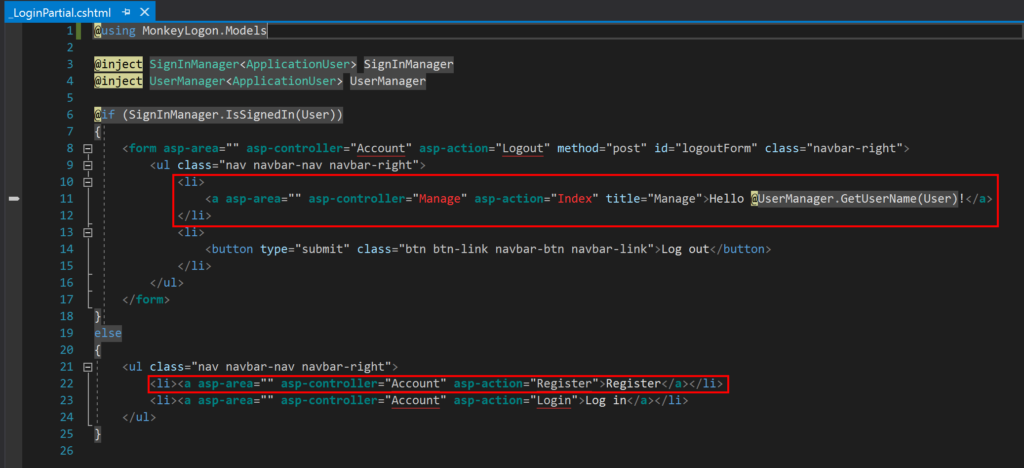
Also, we need to clean up the HTML views that used to provide access to the functionality we just removed. Remove the marked code in the files _LoginPartial.cshtml and Login.cshtml.

Now we’ve got a running web application that won’t allow us to log on to. The reason is that neither internal nor external authentication providers are configured. Before we can add external authentication providers, we must add SSL support. This will be covered in the next article.
The sample code can be found at https://github.com/mhusseini/monkeylogon.