

In the previous articles, we created a web application and added SSL. Next, we’ll register external authentication providers to allow users to logon using their Facebook, Google, Microsoft and such accounts.
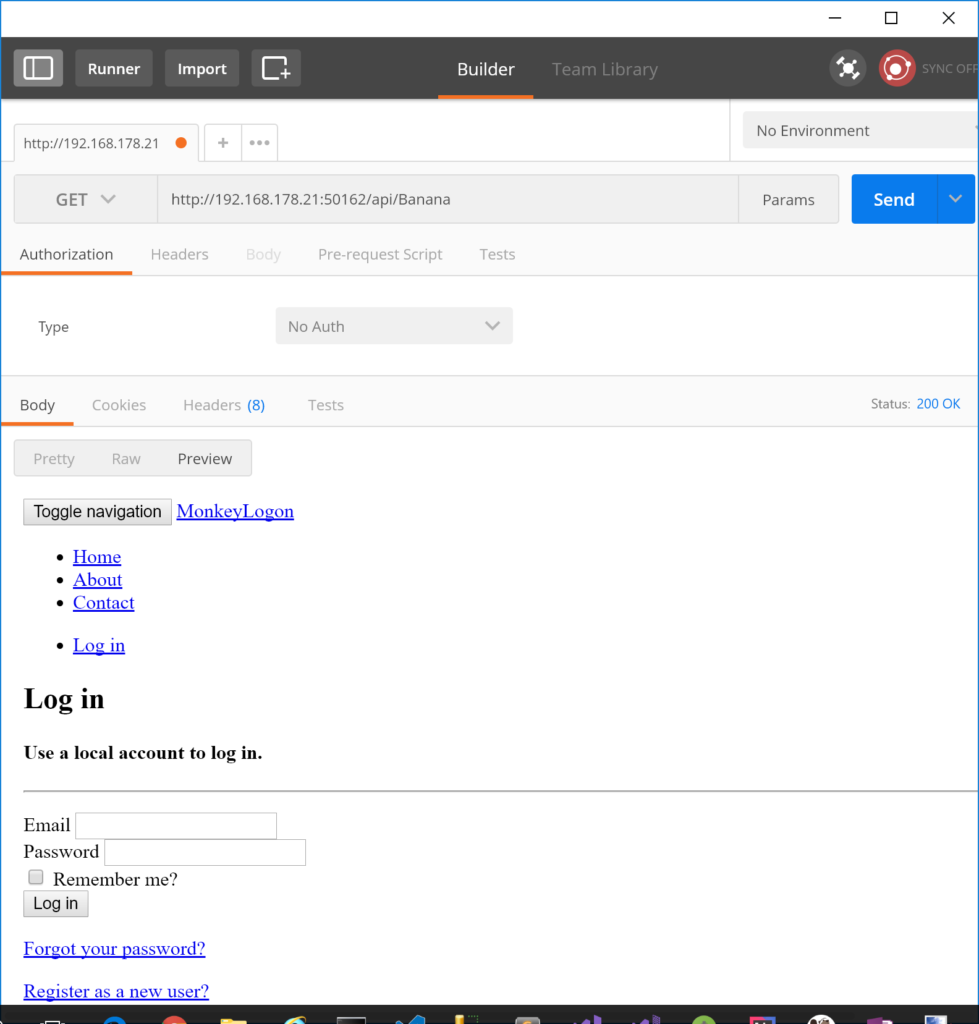
In the sample application, we have an API controller called BananaController. Its Methods are restricted to authenticated users only, so at the moment, since users cannot log on due to missing authentication providers, any call to that API should result in a 401 HTTP code. Since the Visual Studio template we created the web application with adds cookie-based authentication and we haven’t yet changed that, we won’t get a 401, though. Instead, the service responds with a 302 HTTP code and per default redirects the user to the login page. Trying to access BananaController with Postman will bring up the login page).
Prepare authentication providers
In this example, we want to add the ability to log on using Google and Microsoft credentials. Therefore, the following NuGet packages must be installed:
- Microsoft.AspNetCore.Authentication.MicrosoftAccount
- Microsoft.AspNetCore.Authentication.Google
Others are available as well, for example:
- Microsoft.AspNetCore.Authentication.Facebook
- Microsoft.AspNetCore.Authentication.Twitter
- Also, there are awesome packages for almost any provider you know (Dropbox, LinkedIn, GitHub, Fitbit, Imgur… just to name a few) from the aspnet-contrib project. These providers are for ASP.NET Core 1, though. The code is available in GitHub so I guess you can feel free to adopt these providers to ASP.NET Core 2 if necessary.
After installing the two NuGet packages from above, the Monkey Logon application must be registered with each authentication provider. Here’s to register the application with Microsoft and here’s how to do it with Google. ASP.NET Core authentication per default accepts a specially formatted redirect URL (“signin-provider name“). So use these two redirect URLs for the providers, respectively:
- https://192.168.178.21:50163/signin-microsoft
- https://192.168.178.21:50163/signin-google
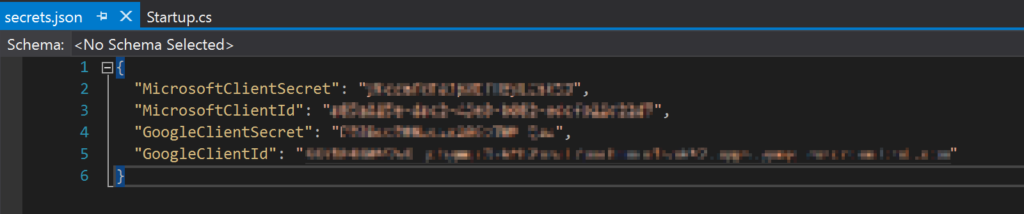
Add user secrets
Instead of pasting client IDs and secrets into the code, better use User Secrets. To do so, install the NuGet package Microsoft.Extensions.Configuration.UserSecrets and update the file startup.cs to look as following:
public Startup(IHostingEnvironment env)
{
    this.env = env;

    var builder = new ConfigurationBuilder()
        .SetBasePath(env.ContentRootPath)
        .AddJsonFile("appsettings.json", optional: false, reloadOnChange: true)
        .AddJsonFile($"appsettings.{env.EnvironmentName}.json", optional: true);

    if (env.IsDevelopment())
    {
        builder.AddUserSecrets();
    }

    this.Configuration = builder.Build();
}
When you klick the “Manage User Secrets” context menu in the Solution Explorer, the file containing the client secrets will be opened for editing. At this point, it’s probably empty. Add the client IDs and secrets you’ve obtained from the registration process above.
Add external authentication
Now everything is ready for the external authentication providers to actually be added to the code. This step is pleasantly simple: just call the appropriate extension methods on the AuthenticationBuilder and set the options from the client secrets in the ConfigureServices method inside startup.cs.
public void ConfigureServices(IServiceCollection services)
{
    // ...

    services.AddAuthentication()
        .AddMicrosoftAccount(options =>
        {
            options.ClientId = this.Configuration["MicrosoftClientId"];
            options.ClientSecret = this.Configuration["MicrosoftClientSecret"];
        })
        .AddGoogle(options =>
        {
            options.ClientId = this.Configuration["GoogleClientId"];
            options.ClientSecret = this.Configuration["GoogleClientSecret"];
        });

    // ...
}
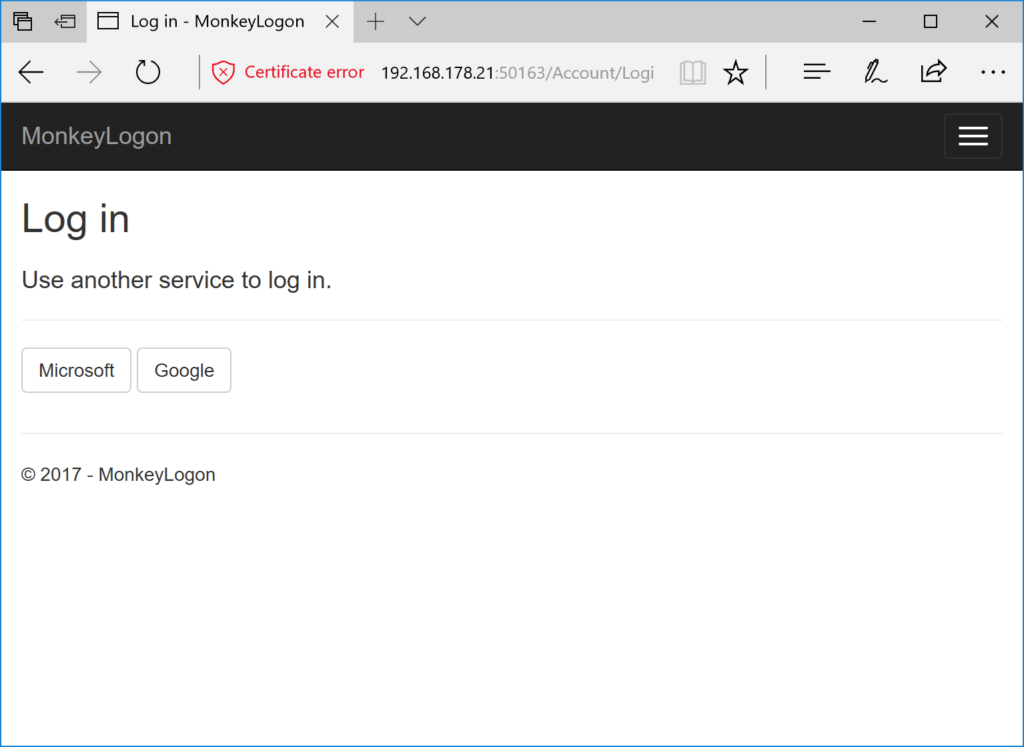
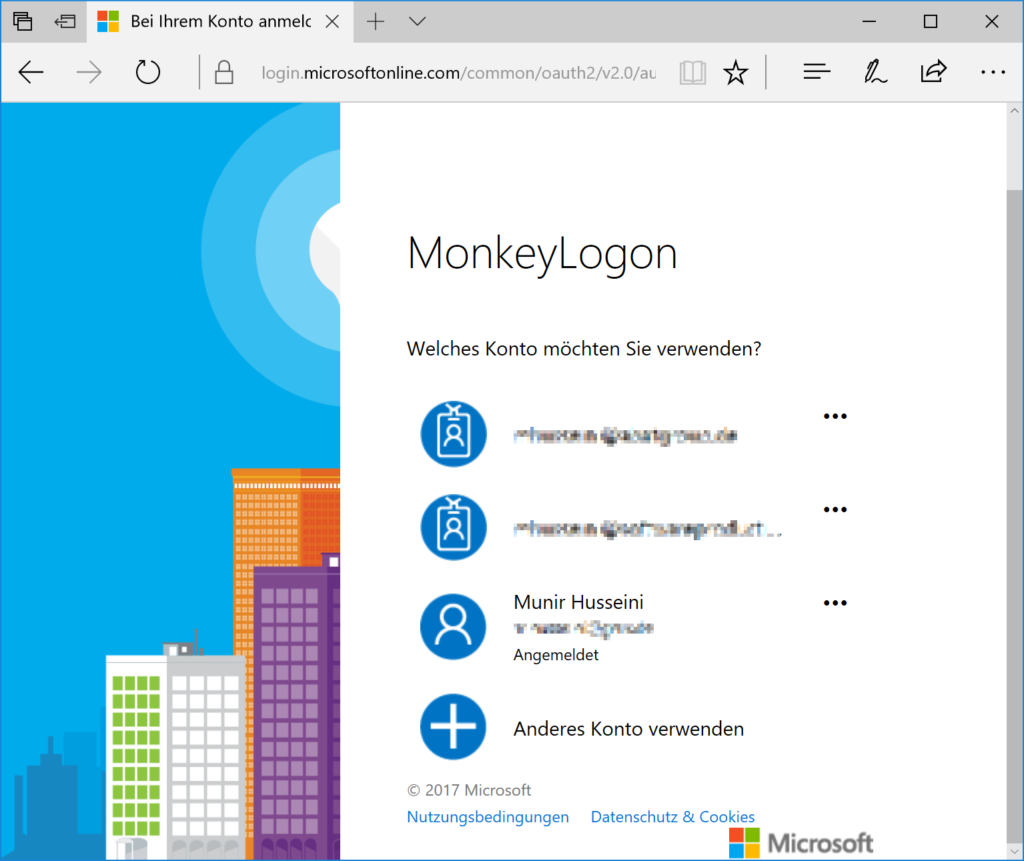
Try this out in the browser, you’ll see something similar to the following.
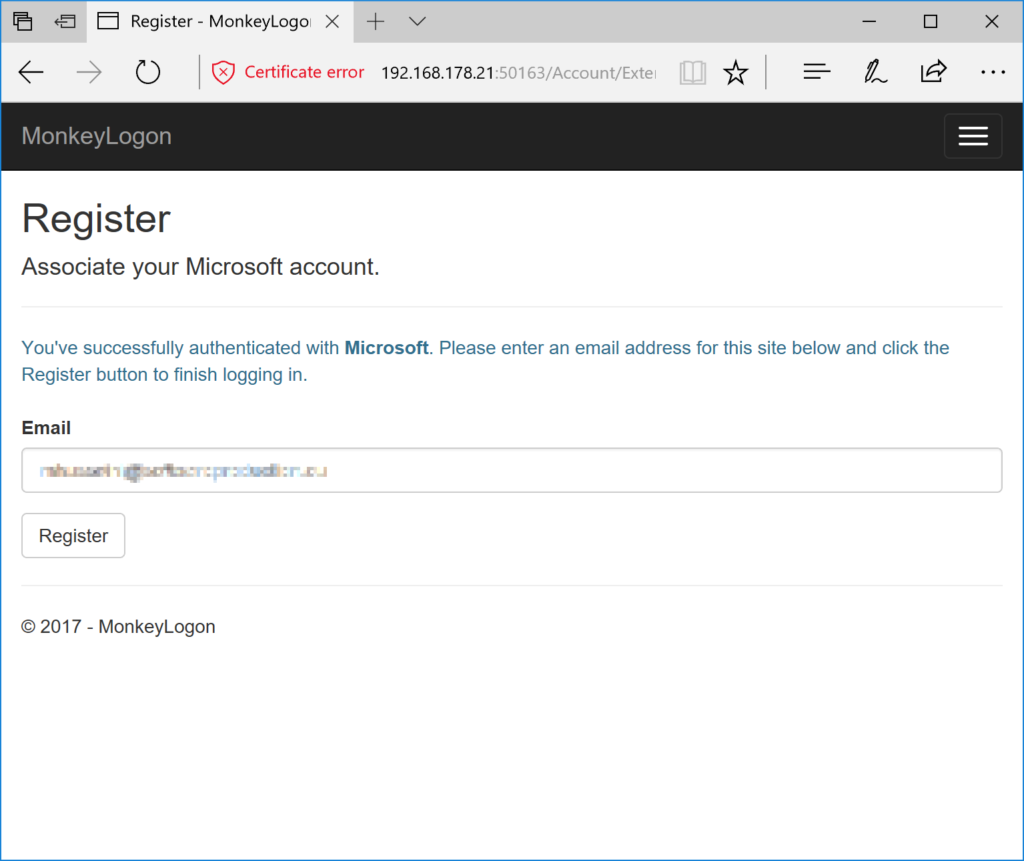
Note that the last step (confirming the user in Monkey Logon) is completely optional. At this point in time, Monkey Logon has got the identity of the user from the authentication provider. The user identity contains a user ID which, combined with the provider name, is a unique representation of the user. The identity also contains some kind of user name and sometimes the user’s email address. Whether you need an additional registration step after the first external logon is entirely up to the requirements of your application. I chose to keep it inside to demonstrate a complexity that is nearer to the real world than many samples.
As mentioned in the first article of this series, we’re implementing an implicit OAuth flow with an embedded code flow. In the current article, we’ve completed the OAuth code flow part. Our web application uses OAuth code flow to authenticate the user against external authentication providers. The authentication works inside the browser now. We’re still not able to authenticate a mobile app against it. In fact, Google blocks OAuth requests made via embedded browsers, and you won’t be able to get any cookies from the native browser to reuse them in your app. We’ll start tackling these issues in the next article.
The sample code can be found at https://github.com/mhusseini/monkeylogon.
