

In the previous article, we created a new web application with ASP.NET Core 2 using the “ASP.NET Core Web Application” template and added “Individual User Accounts” authentication. We then stripped the ability to create users with passwords in the application. Now we’ve got a running web application that won’t allow us to log on to. We could configure external authentication providers now, but first, we need to add SSL support.
Create a server and configure SSL
When registering your application with an external authentication provider, you’ll have to specify a redirect URL. For security reasons, the authentication provider will only accept authentication requests with that redirect URL. Also for security reasons, that redirect URL must start with HTTPS or have “localhost” as host. What we are trying to accomplish here is to log on from a Xamarin app, which will run on a separate device or on a device emulator, i.e. a virtual machine. This means that “localhost” cannot be used, since the mobile app and the web application run on separate machines. Thus, we must enabled HTTPS in our web application.
You could, of course, run the web application on IIS and configure an SSL certificate there, but to keep things simple, we’ll host the web application ourselves and add a development certificate. So next, add a file named ApplicationInfo.cs with the following code.
using System.Linq;
using System.Net;
using System.Net.Sockets;

namespace MonkeyLogon
{
    public static class ApplicationInfo
    {
        public const string AppName = "monkeylogon";
        public const int HttpPort = 50162;
        public const int HttpsPort = 50163;

        public static readonly IPAddress IpAddress = Dns.GetHostEntry(Dns.GetHostName())
            .AddressList
            .FirstOrDefault(a => a.AddressFamily == AddressFamily.InterNetwork);

        public static string GetUrl() => $"https://{IpAddress}:{HttpsPort}/";
    }
}
Also, add a file named Program.cs to the root of the web application project. Add the following code.
using Microsoft.AspNetCore;
using Microsoft.AspNetCore.Hosting;
using System.IO;
using System.Net;
using System.Security.Cryptography.X509Certificates;

namespace MonkeyLogon
{
    public class Program
    {
        public static IWebHost BuildWebHost(string[] args) =>
            WebHost.CreateDefaultBuilder(args)
                .UseKestrel(options =>
                {
                    options.Listen(ApplicationInfo.IpAddress, ApplicationInfo.HttpPort);
                    options.Listen(ApplicationInfo.IpAddress, ApplicationInfo.HttpsPort, listenOptions =>
                        listenOptions.UseHttps(new X509Certificate2("monkeylogon.pfx", ""))
                    );

                    options.Listen(IPAddress.Loopback, ApplicationInfo.HttpPort);
                    options.Listen(IPAddress.Loopback, ApplicationInfo.HttpsPort, listenOptions =>
                        listenOptions.UseHttps(new X509Certificate2("monkeylogon.pfx", ""))
                    );
                })
                .UseContentRoot(Directory.GetCurrentDirectory())
                .UseStartup<Startup>()
                .Build();

        public static void Main(string[] args)
        {
            BuildWebHost(args).Run();
        }
    }
}
The above code launches a Kestrel server and makes it listen on the first IPv4 address found for the current machine and on the loopback address, i.e. on “localhost”. Kestrel listens on two ports, one with and one without SSL. The certificate used for SSL here is a self-signed certificate not suitable for production.
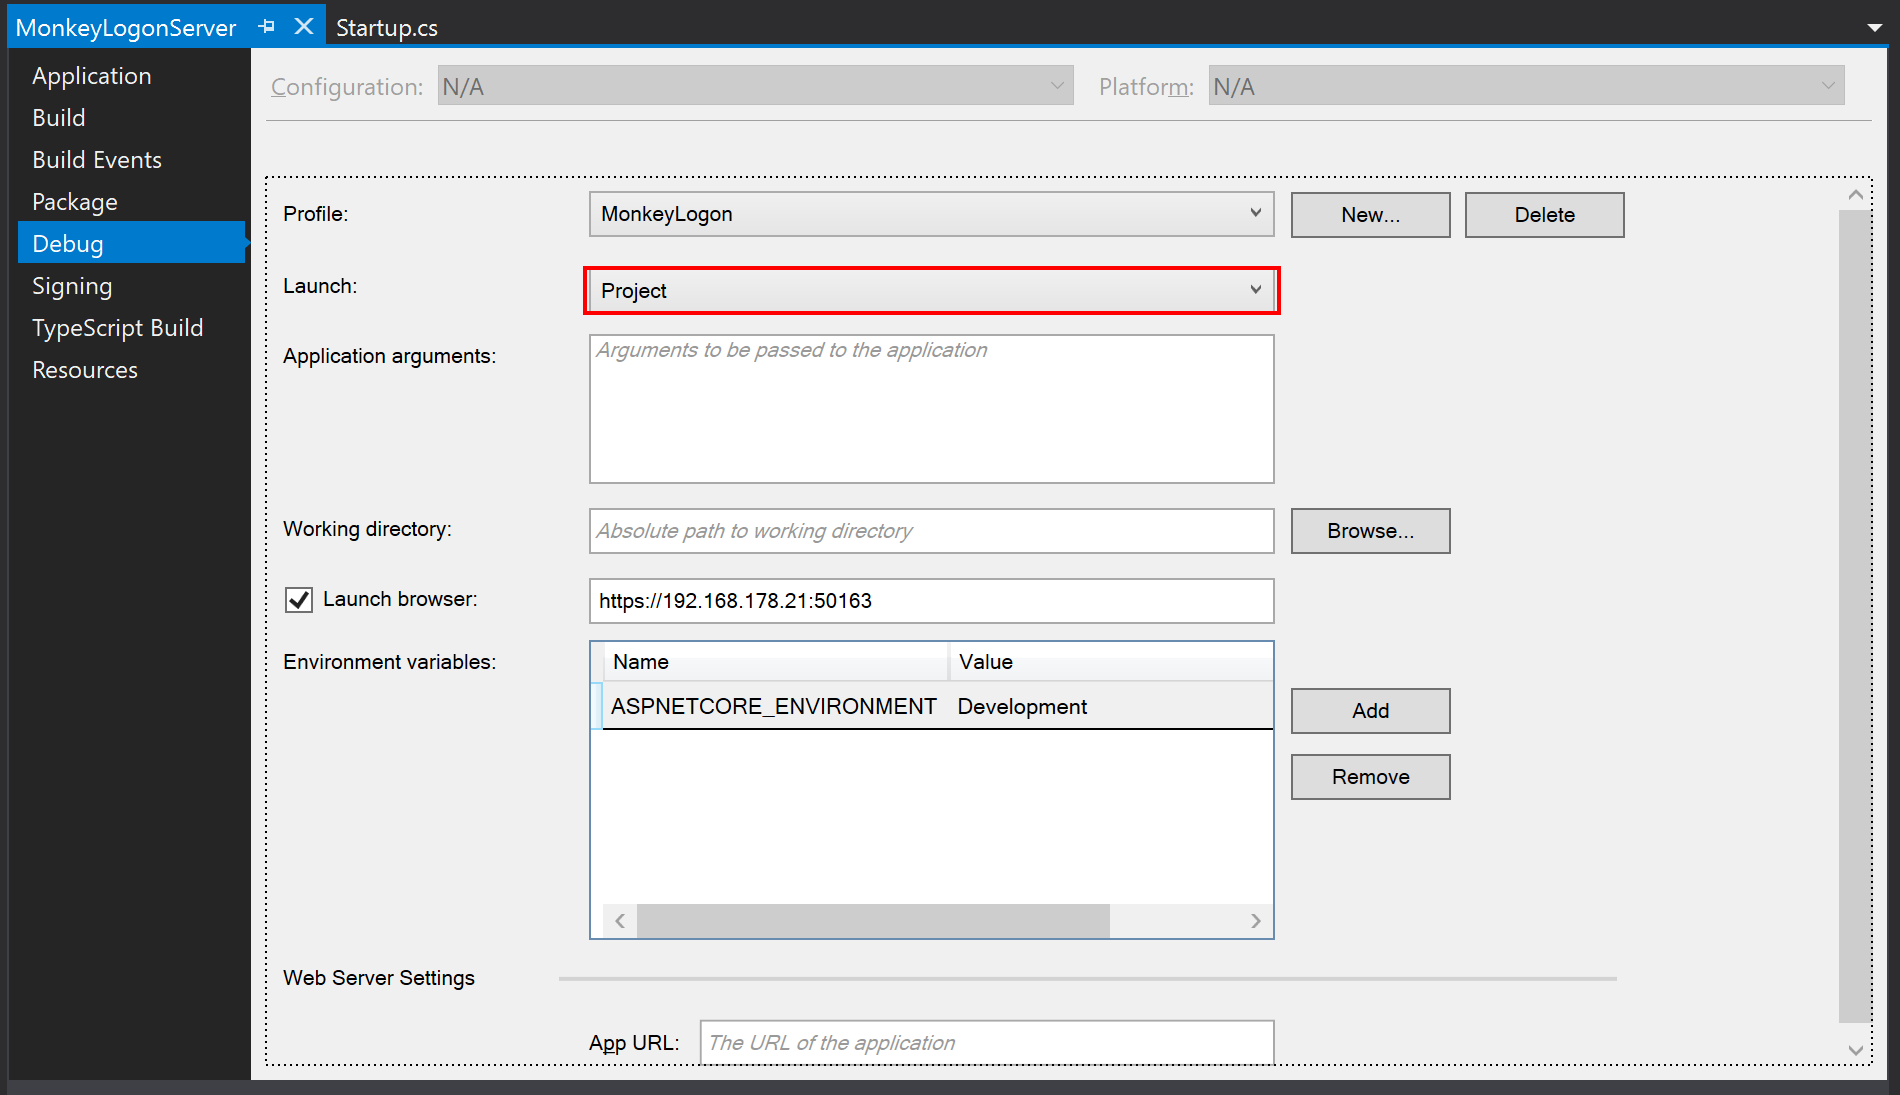
To start the web application using the code we just added, change the project properties and set the launch type to “Project”. Also, set the startup URL to your IP address using the HTTPS scheme and the port specified for HTTPS (in my case: https://192.168.178.21:50163).
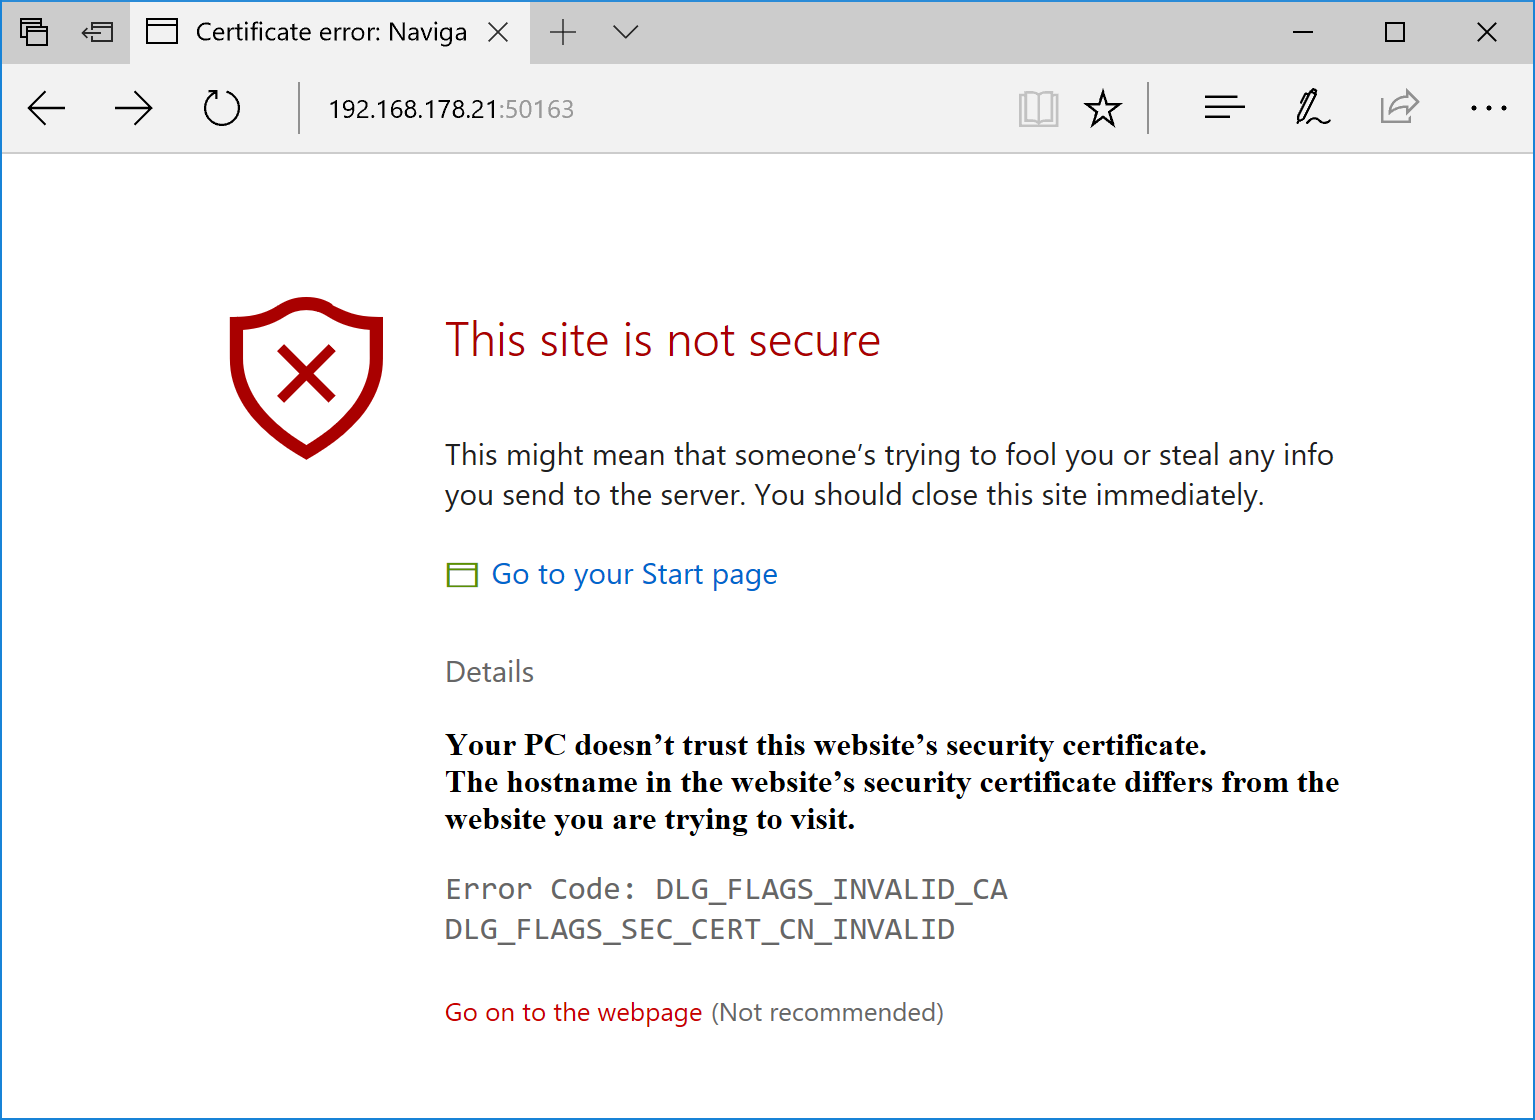
Now we’ve got a web application the supports SSL. If you run the web application in your browser you should see something like the following. Of course, you would go with the “not recommended” option and go on to the webpage 😉 Later in the mobile app, we will disable SSL verification during development.
Great, now we’re set to add the external authentication providers. This will be covered in the next article.
The sample code can be found at https://github.com/mhusseini/monkeylogon.